About the author:
Jason Huang
SCIE A2 student
AHA (American Heart Association) certified instructor
When cardiac arrest occurs, the golden resuscitation time is only four minutes.The survival chance of the patient is practically 0 if resuscitation starts after 10 minutes. Despite being in a first-tier city where emergency medical services (EMS) are rather developed, the time for an ambulance to arrive often exceeds 15 minutes.
If someone you love the most collapses in the next second, yet you don’t know what to do, how desperate would you feel?
In Da Han season, SCIE Red Cross Society held a First Aid popularization event where SCIE “rescuers” learn through watching plays depicting common first aid scenarios and presentations. To facilitate readers that didn’t come to the event to learn about first-aid, I will capture the best out of this event.
The content is split into three parts:
First Aid Basics, Emergency Treatments, CPR (Cardiopulmonary Resuscitation, including how to use AED)
Part I: First Aid Basics
When we encounter any emergencies which require first-aid, what should we do? Here are five steps to bear in mind.
- Safety: Ensure the area is safe for yourself, others and the patient. Try to look for signs of the cause of the problem.
- Check for response: Tap the person and shout “are you OK” and look for response ( examples of ‘response include moves, blinks, speaks).
- Shout for help: send someone to call 120 and get the first aid kit and AED. Do not hang up until the dispatcher tells you to. If you were alone, then turn on speaker mode.
*Note: Be sure to know the local emergency telephone number, especially for us overseas students( e.g. the UK and HK: 999, US and Canada: 911)
- Check for breathing: If the person is not breathing or is only gasping, begin CPR immediately.
- Accompany the patient: Stay with the patient until someone with more advanced training arrives and takes over.
*Personal Protective Equipment (PPE)
Wear PPE whenever you give first aid (with the correct method for taking off gloves), and wear eye protection if the ill or injured person is bleeding.
Part II: Emergency Treatments
Through interactive learning, the audience has learnt some common first-aid measures such as treating nosebleeds, external hemorrhage, severe choking ( Heimlich maneuver), broken bones and sprains. I have selected the essence as presented below.
Nosebleeds
“What did you use to do when your nose bleeds?”
“Lean my head upwards”, “Use a tissue to block the nostrils”, “Raise your hand.”
“Yes, everyone’s answer is very intriguing, but the correct method is to tip your head forward and then use the surgical dressing to pinch the nostrils until the nose stops bleeding……”
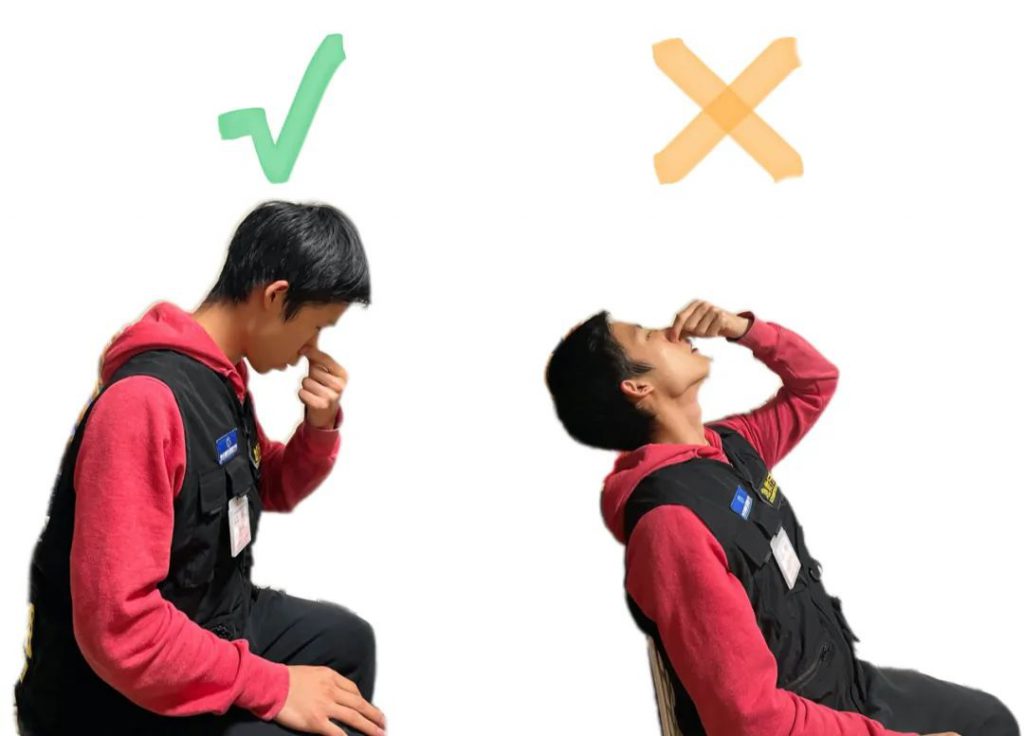
The patient should lean forward (instead of tilt your head backward). Tilting backward does no more good than harm in stopping bleeding, and the blood could flow down one’s trachea, potentially causing breathing problems and triggering vomiting.
*Note: If any of the below scenarios happen, call 120
- You can’t stop the bleeding within 15 minutes
- The bleeding is severe
- The patient has trouble breathing
External hemorrhage (bandaging)
Difference between a dressing and bandage:
Dressing: A dressing is a wound covering used to stop bleeding and prevent infection. It can be a gauze pad or any other clean piece of cloth or even a gloved hand.
Bandage: Material used to protect or cover an injured body part and apply pressure on the wound.
Complete procedures:
- Make sure the scene is safe.
- Get the first aid kit.
- Wear PPE (especially gloves).
- Put a dressing on the wound. Apply direct pressure on the
dressing using the flat part of your fingers or the palm of your hand. - If the bleeding does not stop, add more dressings on top of the
first and press harder.
*Note: Once the dressing is in place, then do not take it off
- Once bleeding is stopped, use a bandage to cover the dressing
- For smaller wounds, wash the area with lots of clean water and soap and apply dressings.

Choking ( Heimlich maneuver)
If the person is able to cough and make sounds, then it is mild choking and should stand by and let the person cough.
If the person cannot cough and make sound or breathe, or is making a choking sign, act quickly as the choking is severe. Follow the steps listed below
- Getting approval
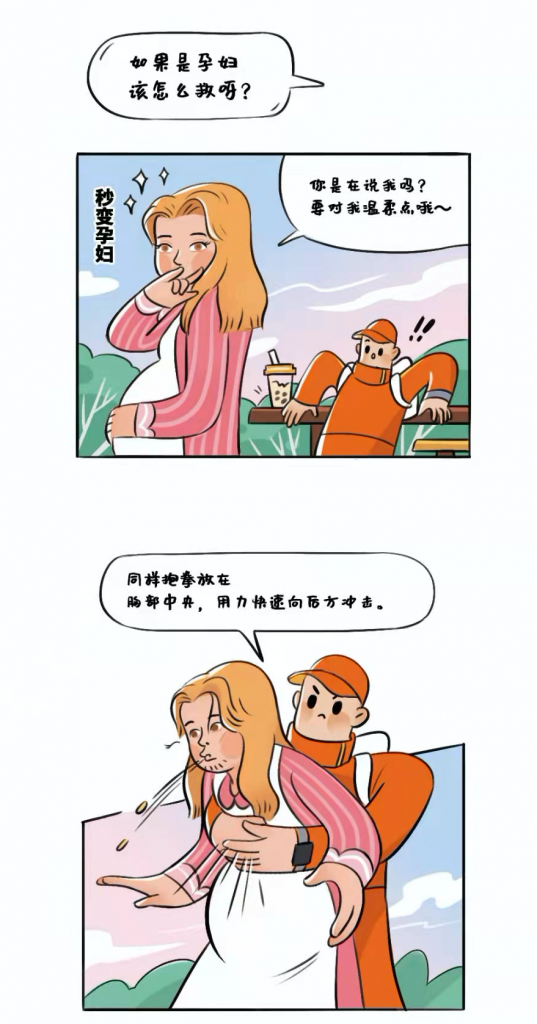
Ask, “Are you choking? ” If the person nods yes, tell him that you are going to help. (If the person is a woman, ask whether she is pregnant, see step 5 for guidance in first-aid)
(2) Position
place your front foot between the person’s feet.

(3) Hand gesture and location
Put the thumb side of your fist slightly above his belly button and well below the breastbone. Grip the fist with your other hand.
(4) Giving thrust
give quick upward thrusts into his abdomen.
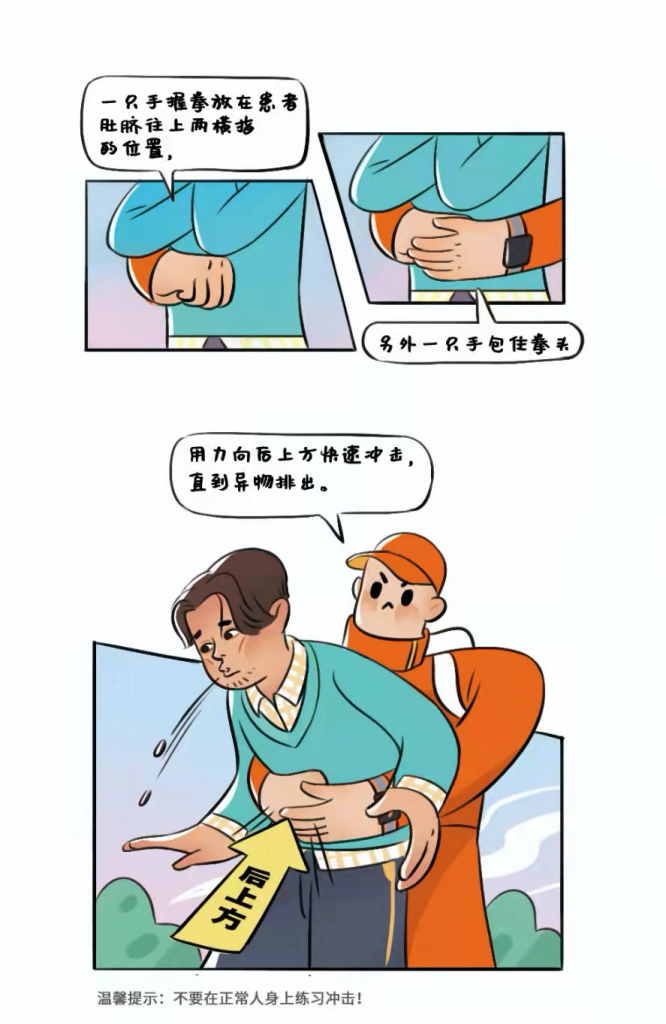
*Note: Do not practice giving thrust on a normal person! After the choking incident is over, the person should be evaluated by a healthcare provider to make sure there is no damage to the airway or other internal injuries.
(5) For pregnant women and large people

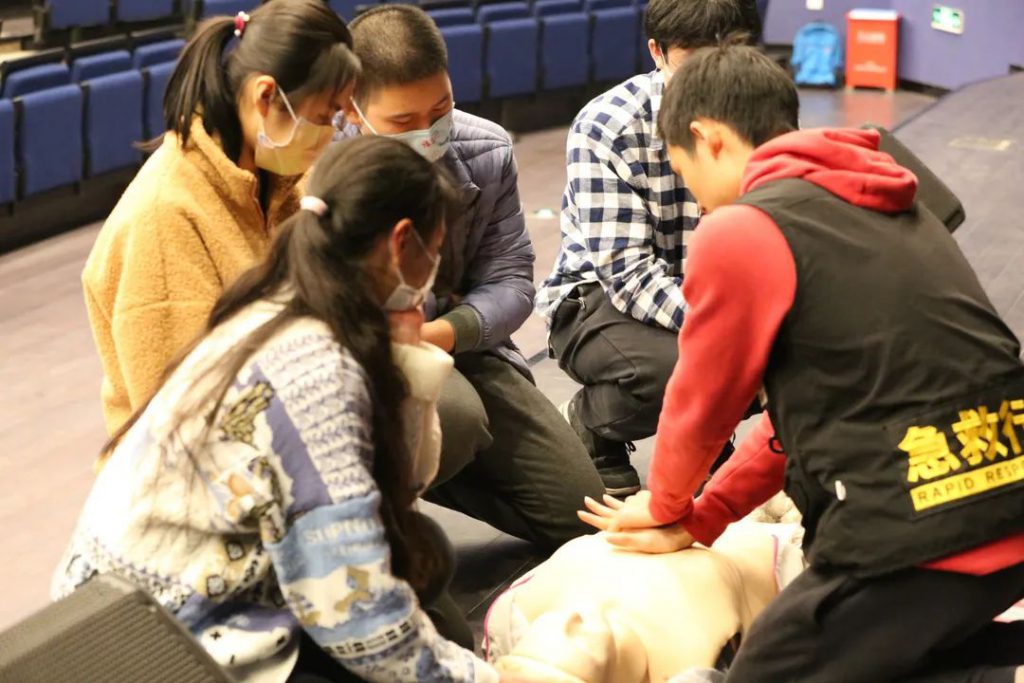
Part III: CPR (Chest compression + rescue breaths)
“When cardiac arrest occurs, the golden resuscitation time is only four minutes, the survival chance of the patient is practically 0 after 10 minutes.”
In the second half of the event, the audience has learnt how to carry out CPR, from examining the patient to using the life-saver AED ( Automated external defibrillator). Learning first-aid is showing respect to life and the best preparation for future emergencies.
Chest Compression formula
- Depth: For an adult, compress 5 ~ 6 cm. For a child, compress about 5 cm.
- Rate: 2 compressions per second.
- Proper rebound: let the chest completely return to its normal position after each compression.
- Consistency: Do not pause between compressions, and the time interval between each set of compression should not exceed ten seconds. Even if the two rescue breaths are not given, get back to compression.
- 30:2 After 30 compressions, give 2 rescue breaths.

Complete procedures:
(1)Make sure the emergency scene is safe, tap and call the patient and see whether they are conscious. If not, call someone to get an AED and call 120.
(2)To examine breathing, look to see rise and fall in their chest and abdomen and count for six seconds. If no movement is observed, then immediately start to do CPR.
(3)Lie down the patient on a flat, horizontal surface, with one hand in the middle of the sternum and the other on top to interlock your fingers, press down vertically with the help of your upper body weight. 5 ~ 6cm of depth for each compression and perform it two times every second. If one is not willing to perform rescue breaths, one can continually perform chest compression. If one is willing and capable of giving rescue breaths, give two rescue breaths after every 30 compressions. Repeat the above steps continuously until an AED or an ambulance arrives.)
AED
Use AED as soon as it arrives
- Turn the device on (some turn on automatically after removing the lid, some require pressing the power button) and listen for its instructions.
- Peel the backing off the pads as directed, one at a time, to expose the adhesive.
- Place the pads according to the pad figure on the person’s exposed chest.
- AED will start analyzing the heart rhythm; the rescuer should shout “Stay away” and make sure no one touches the patient. If no shock is necessary, immediately resume CPR.
- If a shock is needed, the AED will instruct “Stay away from the patient” the rescuer should shout “Stay away” and make sure no one is touching the patient.
- Push the “shock” button and after the shock is delivered, immediately resume to CPR.
Special conditions:
- Excessive chest hair: Too much hair could interfere with pad-to-skin contact. Therefore, quickly shave the areas where the pads will be placed and then attach the pads.
- Water: remove them from the water before using the AED.
- Inclement weather(e.g. snow and rain): can be used normally but prior to using, wipe the person’s chest dry before placing the AED pads.
- Pacemakers and implantable cardioverter-defibrillators: Can be used normally, but avoid placing the pads directly over the device.
- Transdermal medication patches: Wear gloves and take them off, wipe the areas and then place the pad
*Note: Once the pads are in place, do not peel them off and do not turn AED off under any circumstances.
Congratulations! Through the above introductions, you have learnt the basics of first-aid. I am aspiring that more people can be involved in first-aid learning, and potentially you can guide and appeal for more people to the spread of first-aid knowledge. Under the premise of protecting yourself, become the life guardian for your friends, family, city and always be ready to rescue lives!